

Lead generation widget
A lead generation widget is typically a form designed to collect lead data — something almost everyone has encountered online. These forms have a wide range of use cases: from simply leaving contact details to placing an actual order.
In this article, we’ll walk through building such a form. It will:
- collect user input;
- submit the collected data;
- redirect to a personalized thank-you page.
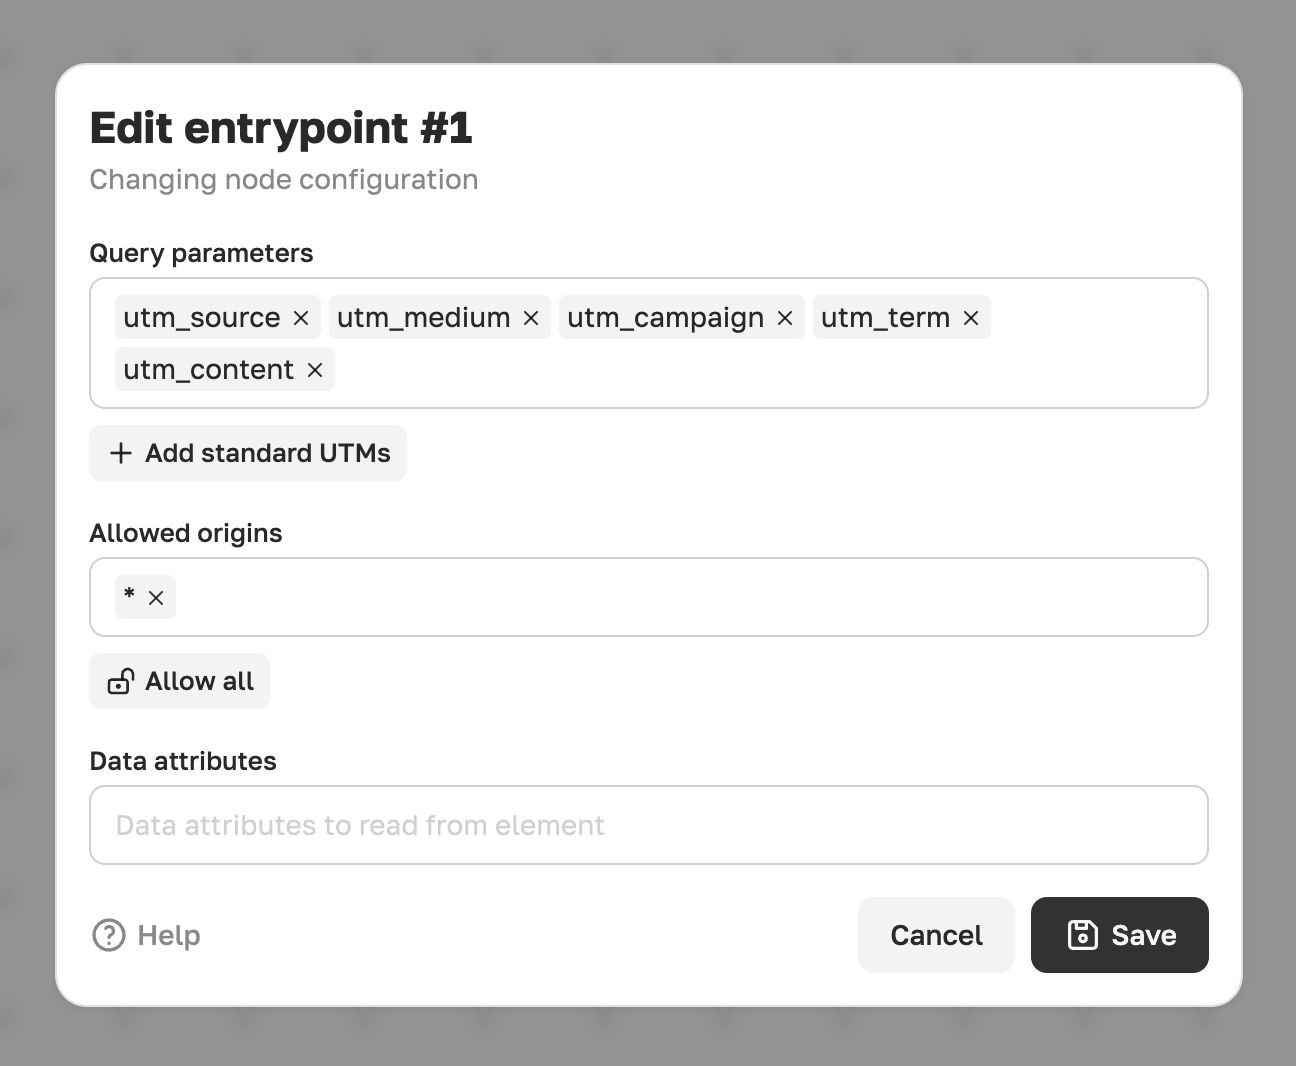
As usual, we’ll start with an empty flow. We can add parameters to the entrypoint to capture values from the browser URL. Let’s start by adding the default UTM parameters.
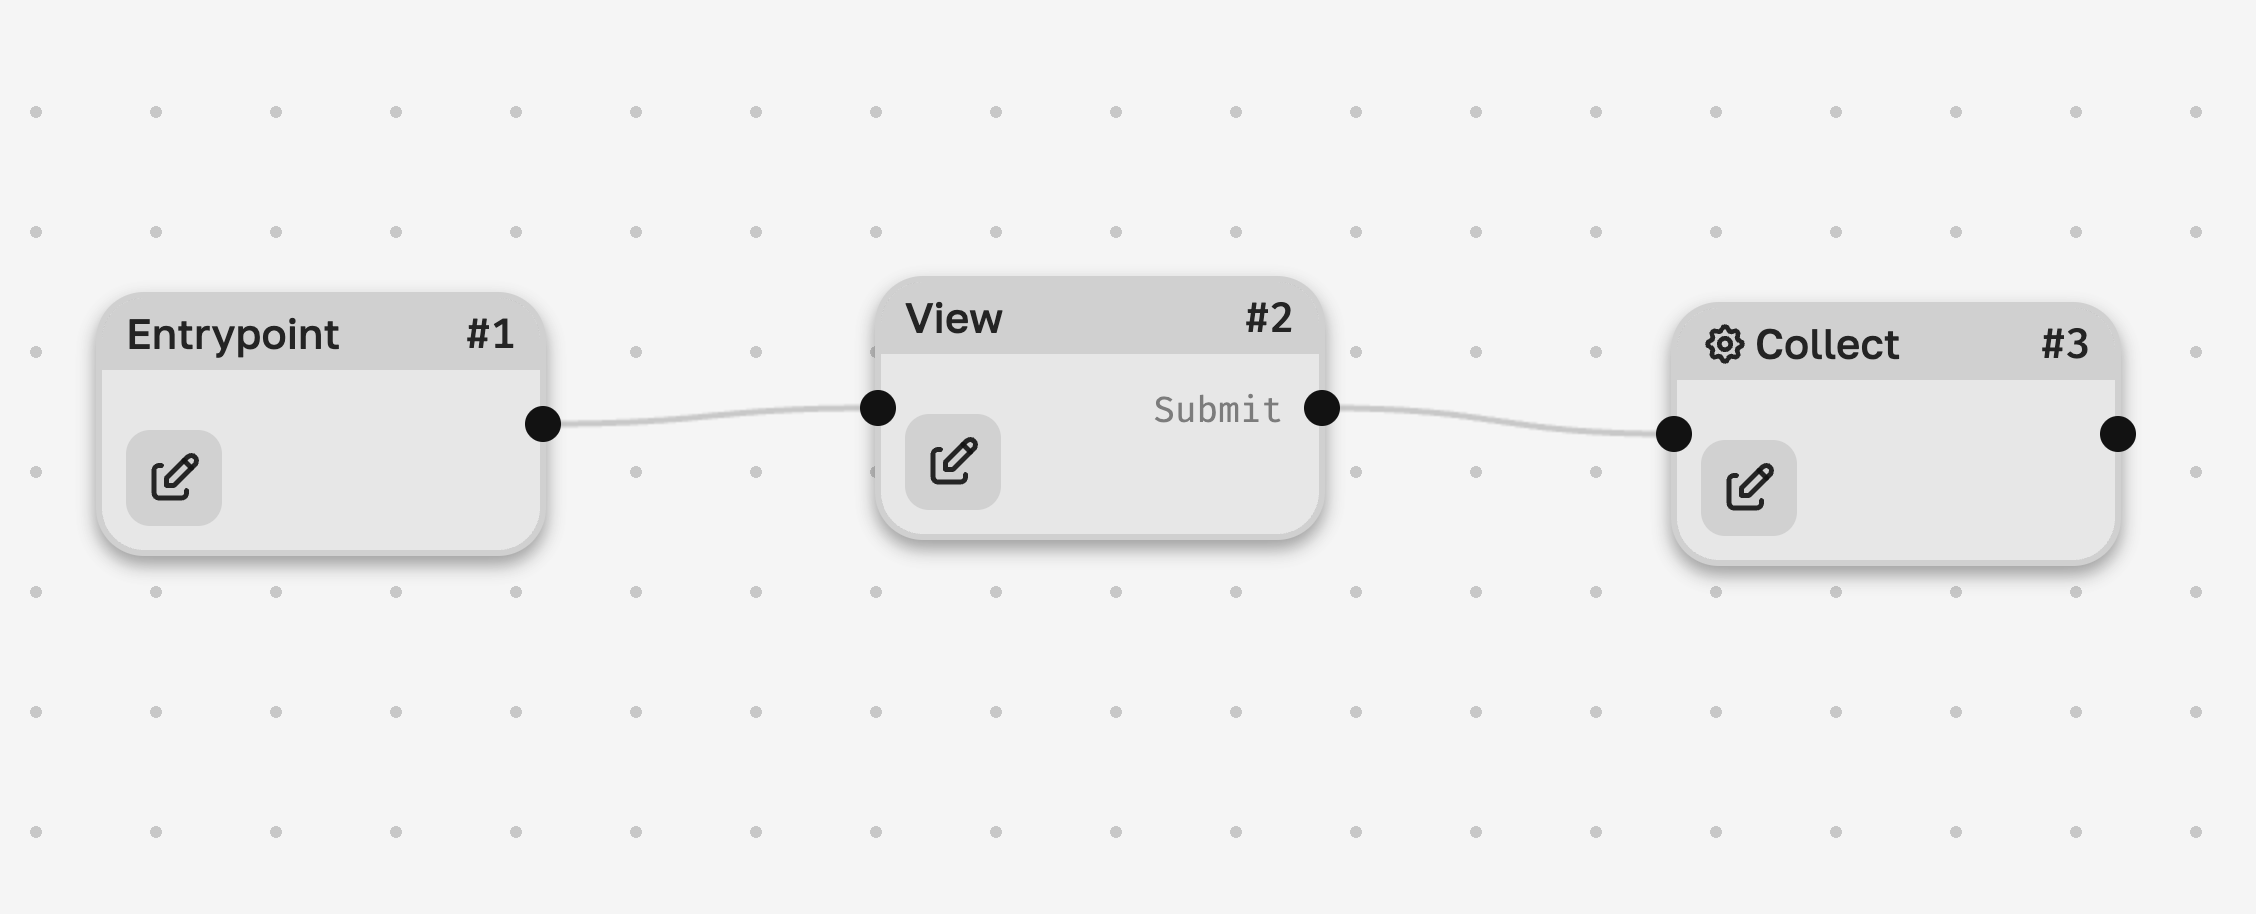
Now let’s add a view to display the lead generation form.

In this example, we’ll collect the user’s first name, last name, and email address. Let's build some basic form just for demonstration:
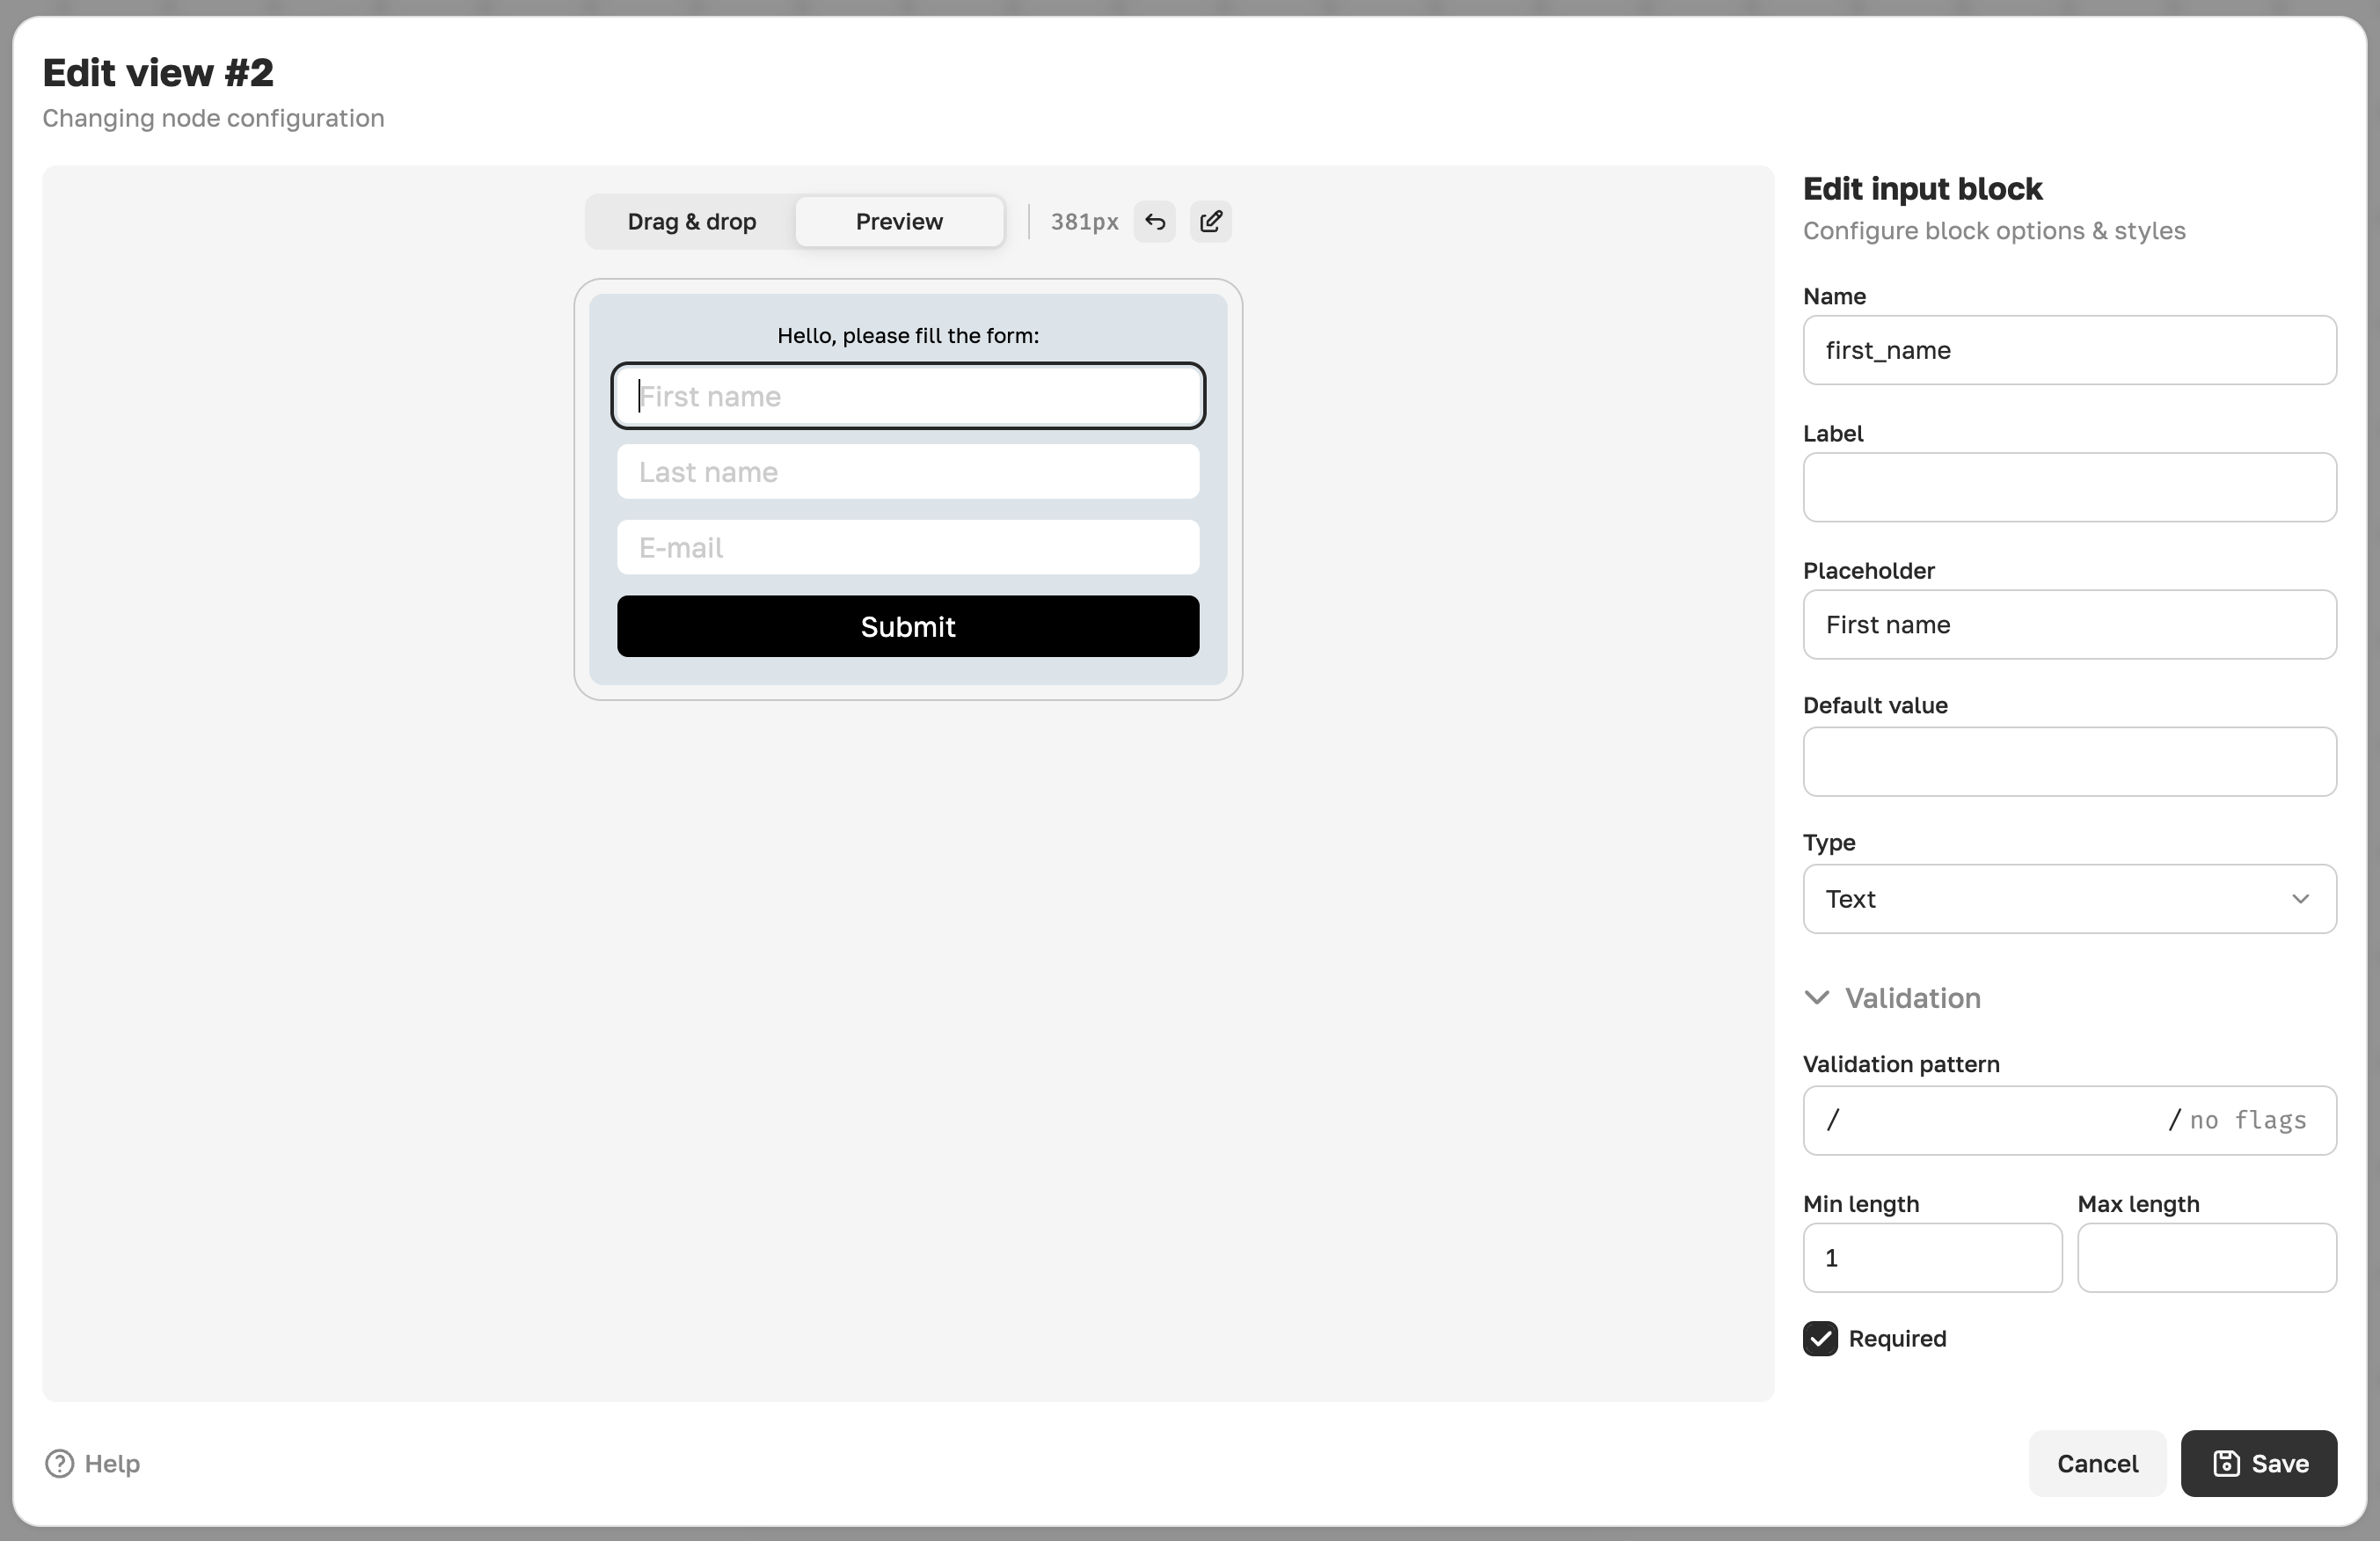
We need to assign a name to each field so that we can reference them as context values in the following nodes.
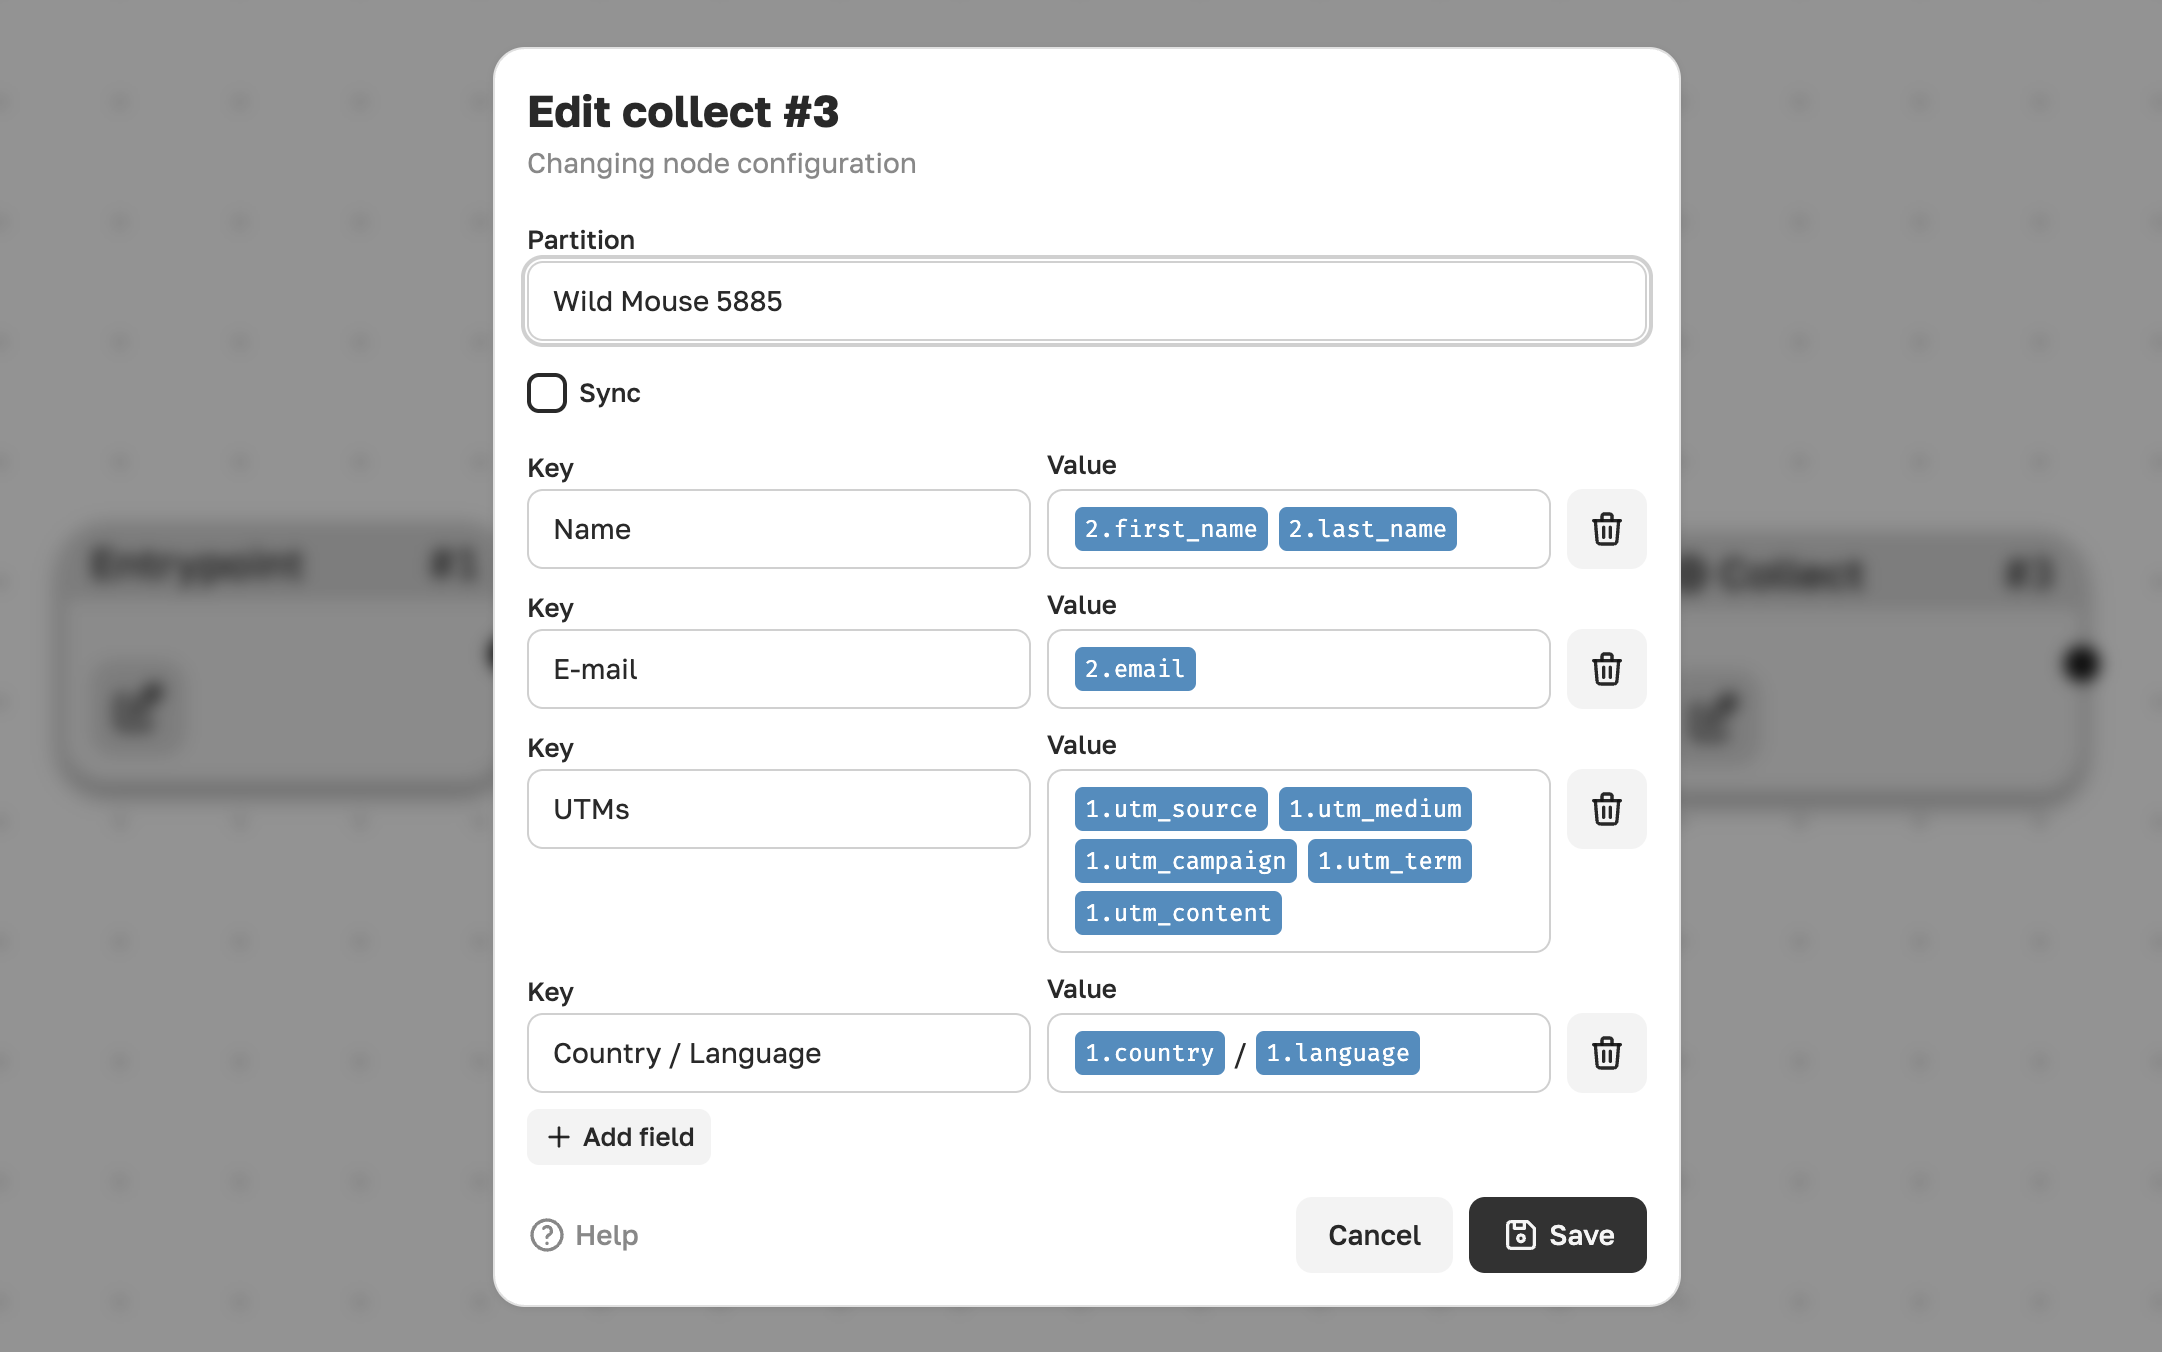
After the user submits the form, we want to save their data. This can be easily done using the collect widget flow node. The data will be sent to the Widged server and can be found under the Results tab in Studio.
We’ll include the UTM parameters, lead data, as well as the user’s country and language (these are available by default). We can perform the collect asynchronously, since we don’t need the result of the collected record. This approach is simply faster.
We don’t need to worry about data delivery — once the submission is triggered, the data will be sent even if the user leaves the page. That means we can immediately add a redirect node after collect.
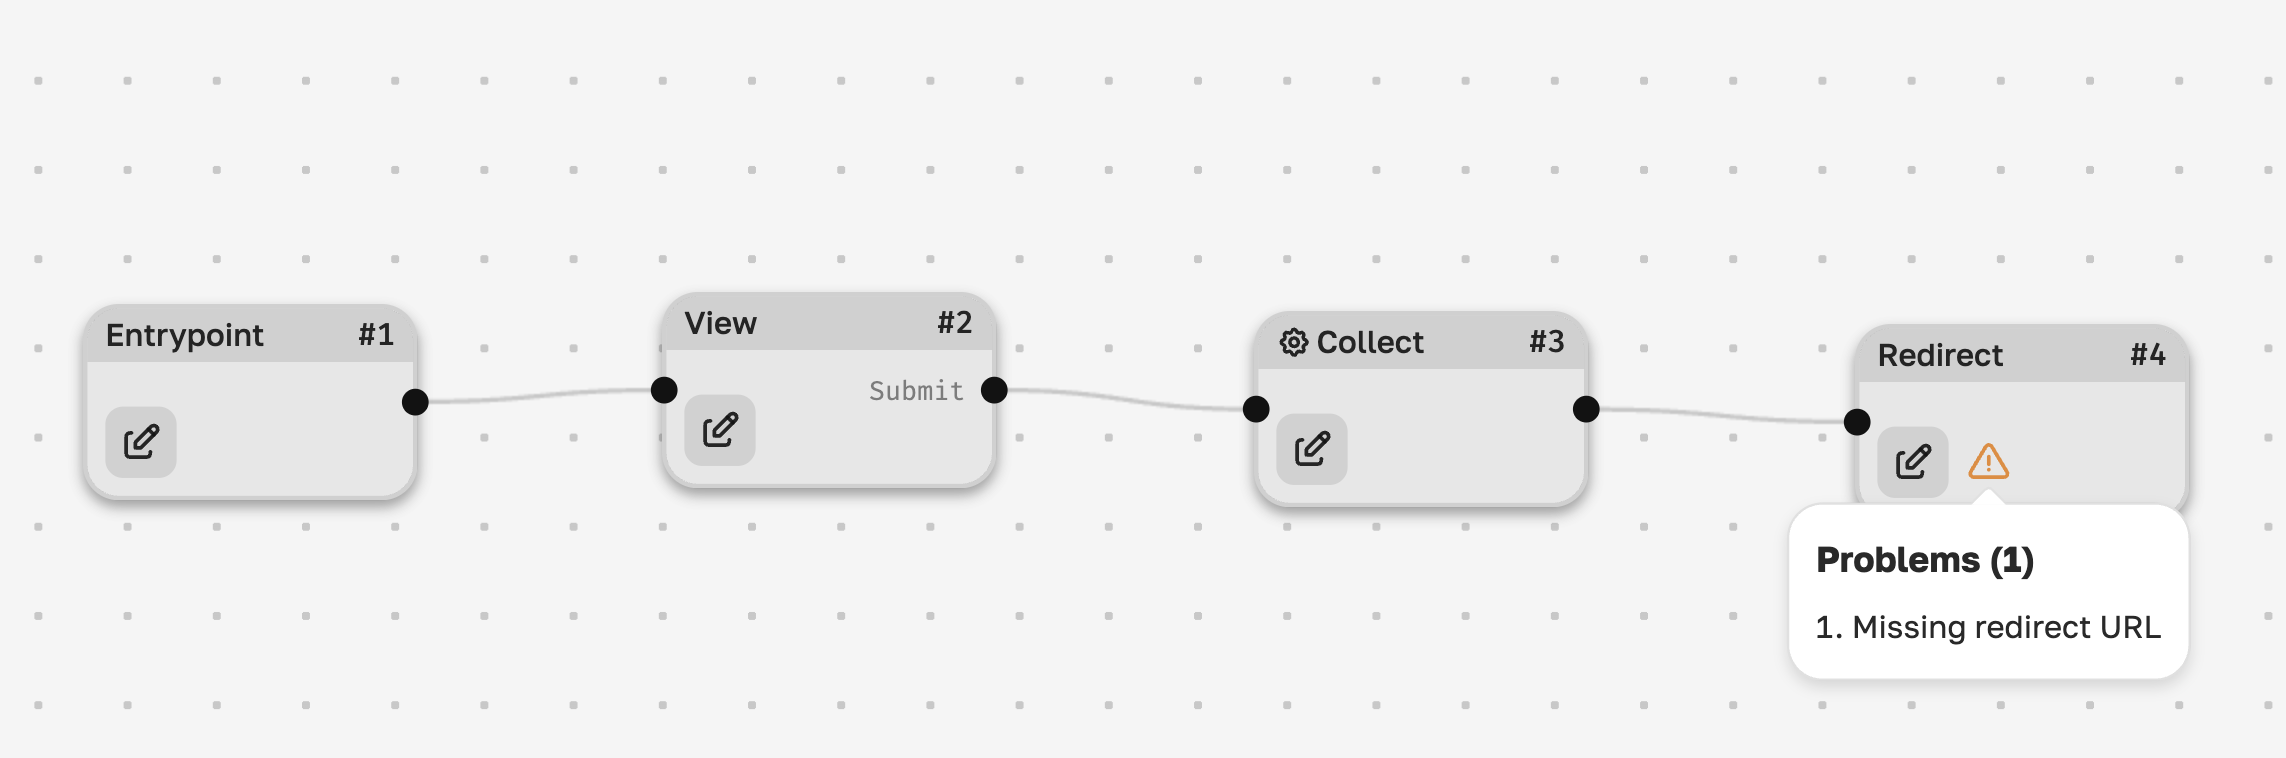
In the redirect, we can specify any URL. Let’s point it to our thank-you page and include the user’s name to display a personalized message like:
Thank you, [name]!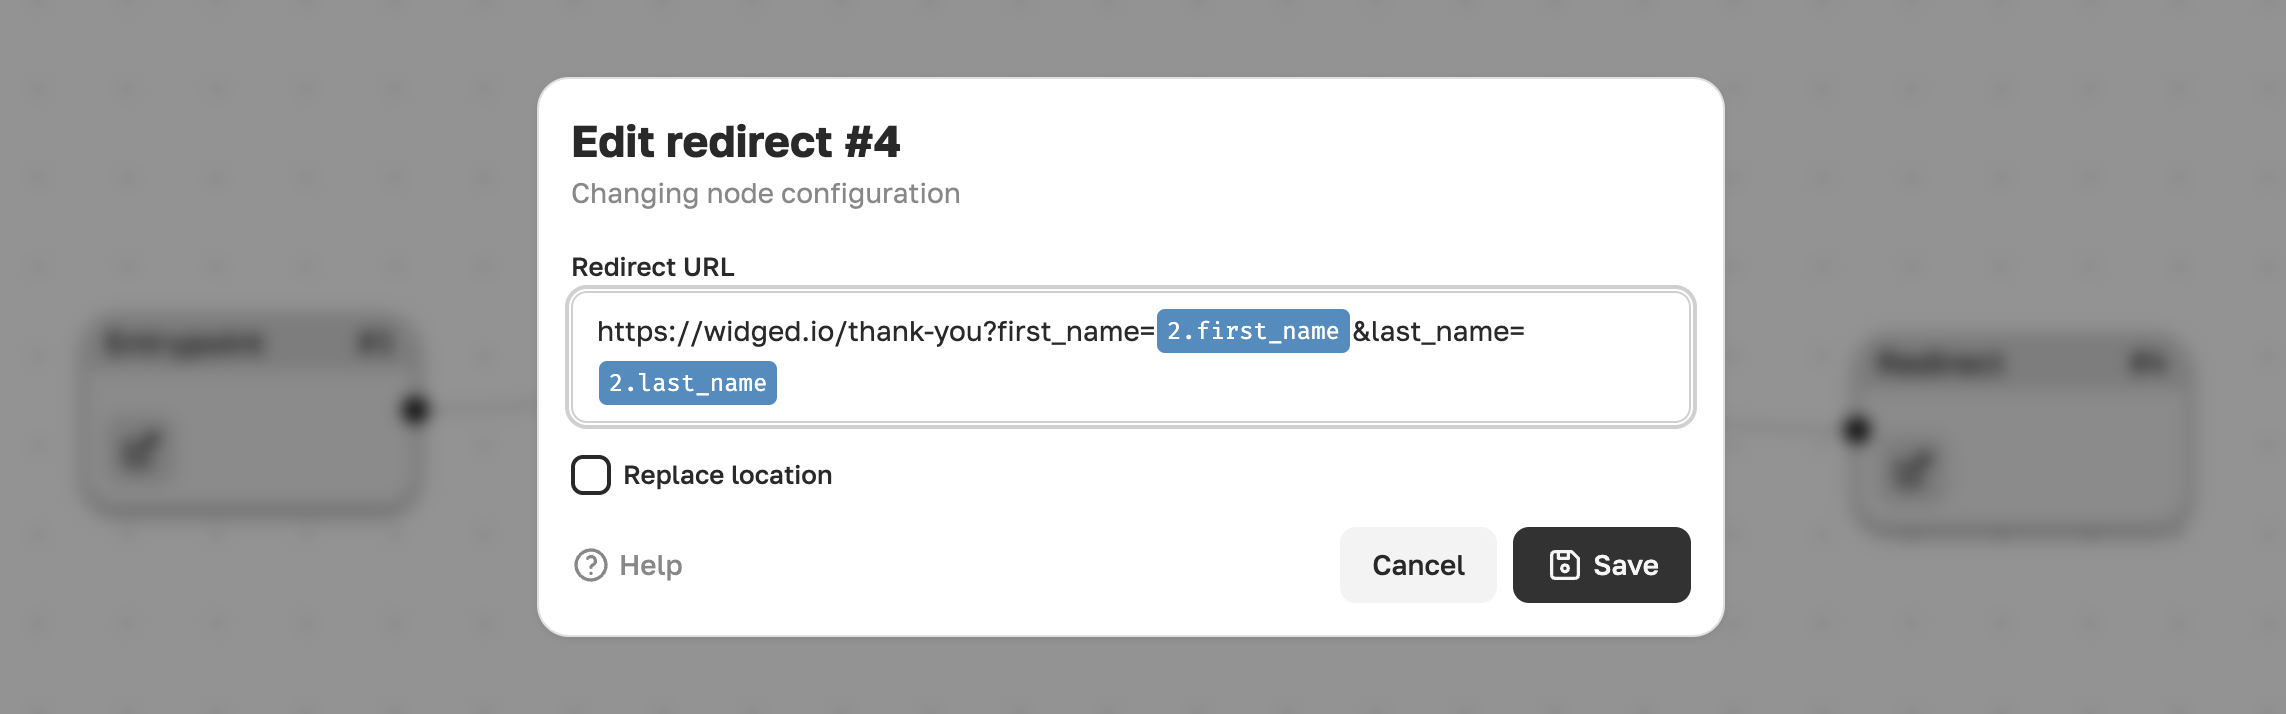
That’s it — our widget is ready! All that’s left is to publish it and start receiving your first submissions.
In just 5 minutes, we’ve built a fully functional lead generation widget. 🎉 Notice how easily we can control the flow of data using context values!
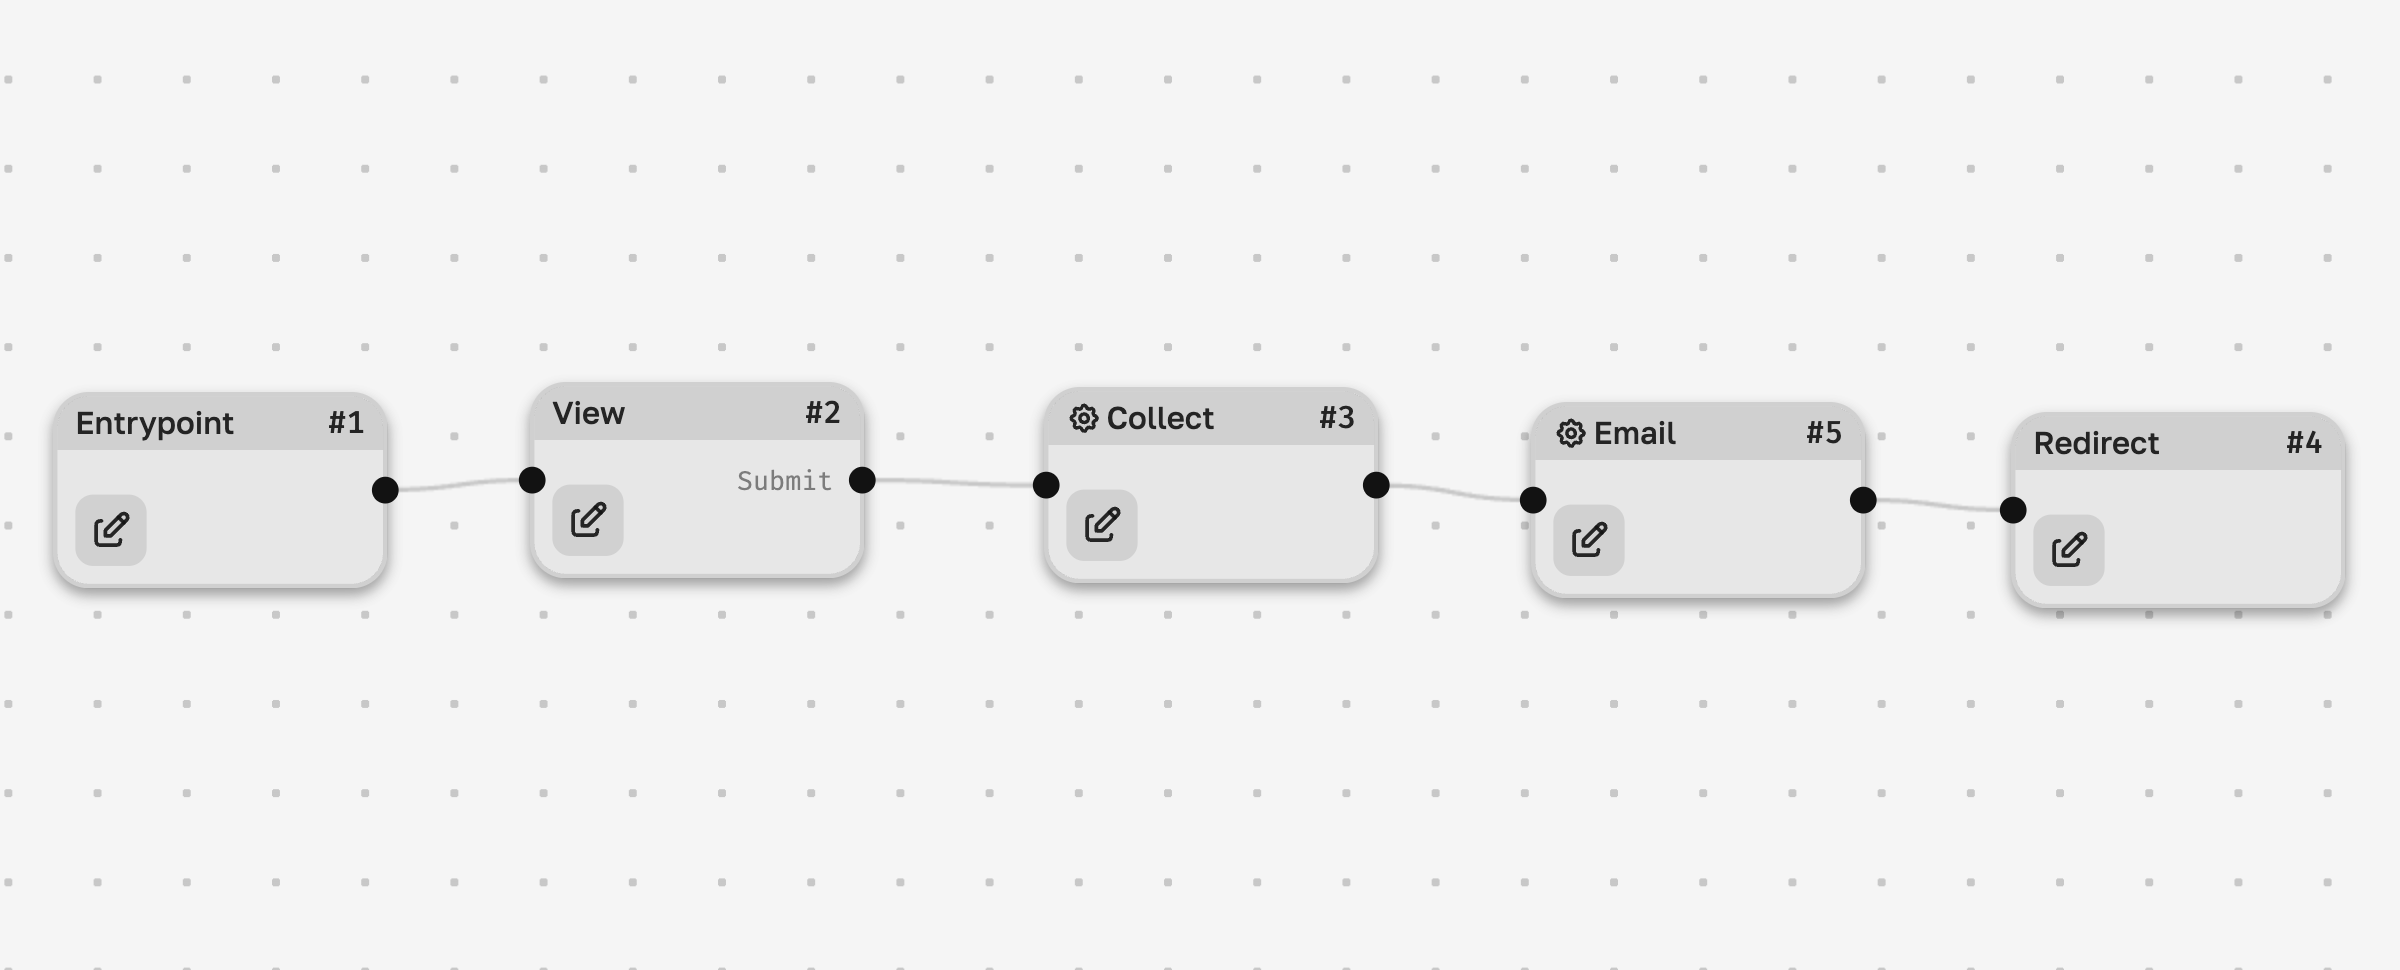
You can also set up features like email notifications to get alerted about new leads as quickly as possible.
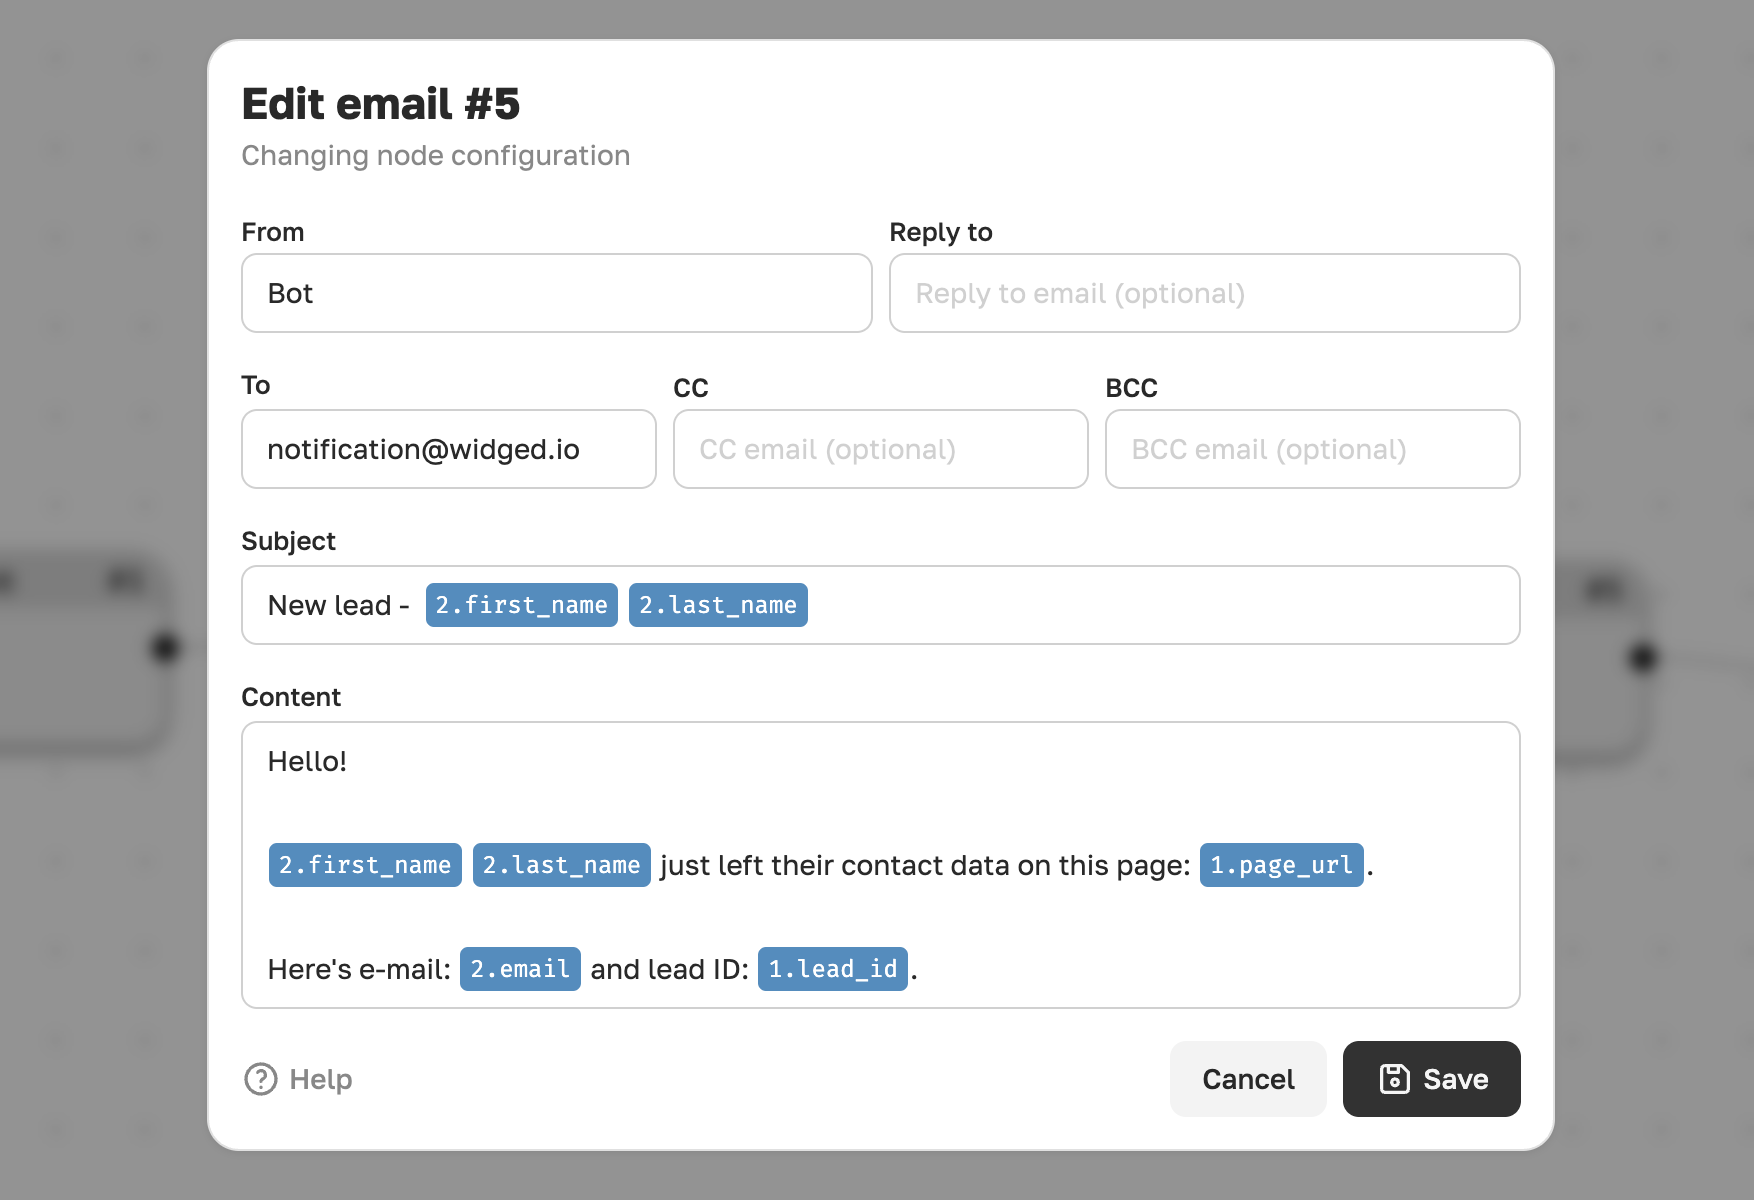
This is easy to do — just add an email widget flow node right after the collect step:
Let’s add a basic configuration and an email template:
This flow will consume 2 operations (collect + email) per lead. Note that operations are not used for regular visitors who don’t submit the form. For example, on the Team plan with 2,000 operations included, you can collect up to 1,000 leads. On a monthly plan priced at $39, that’s a cost of just ~$0.04 per lead (excluding acquisition costs).