

Analytics pixel
An analytics pixel is placed on a page to collect user data without requiring any interaction. There are many user tracking solutions on the market, but with Widged you can flexibly configure exactly what (and when) you want to collect.
In this recipe, rather than demonstrating a specific use case, the author believes it’s better to showcase the platform’s capabilities.
The main node for tracking user data is collect. Using collect, user data will flow directly into the Results tab in Studio. What comes before this node is entirely up to you.
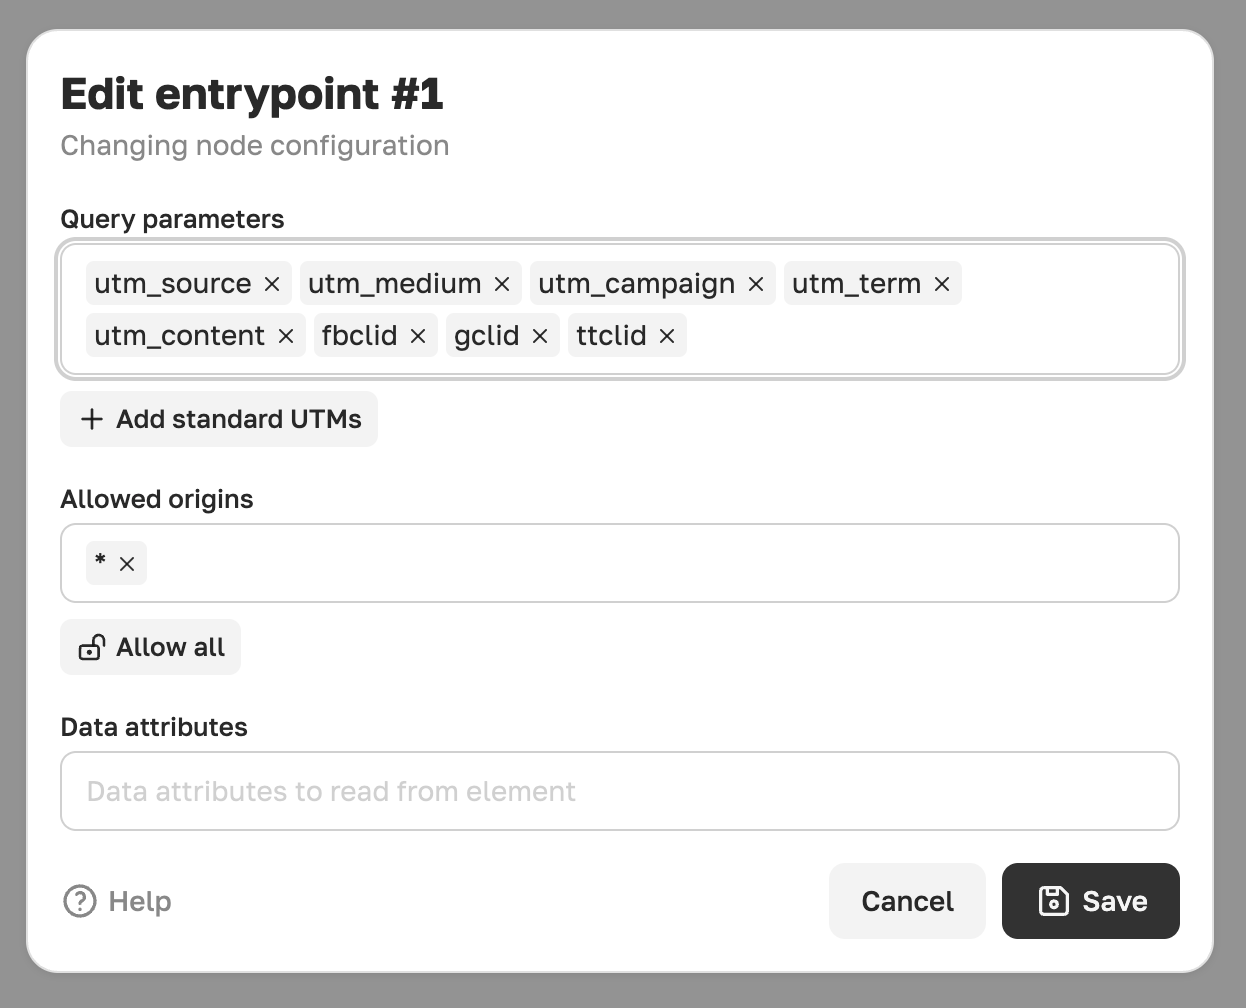
For example, we can capture several query parameters from the page URL. Let’s imagine we’re interested in standard UTM parameters and advertising identifiers from well-known services:
Then, for example, we can read analytics cookies using storage to retrieve the analytics identifier:
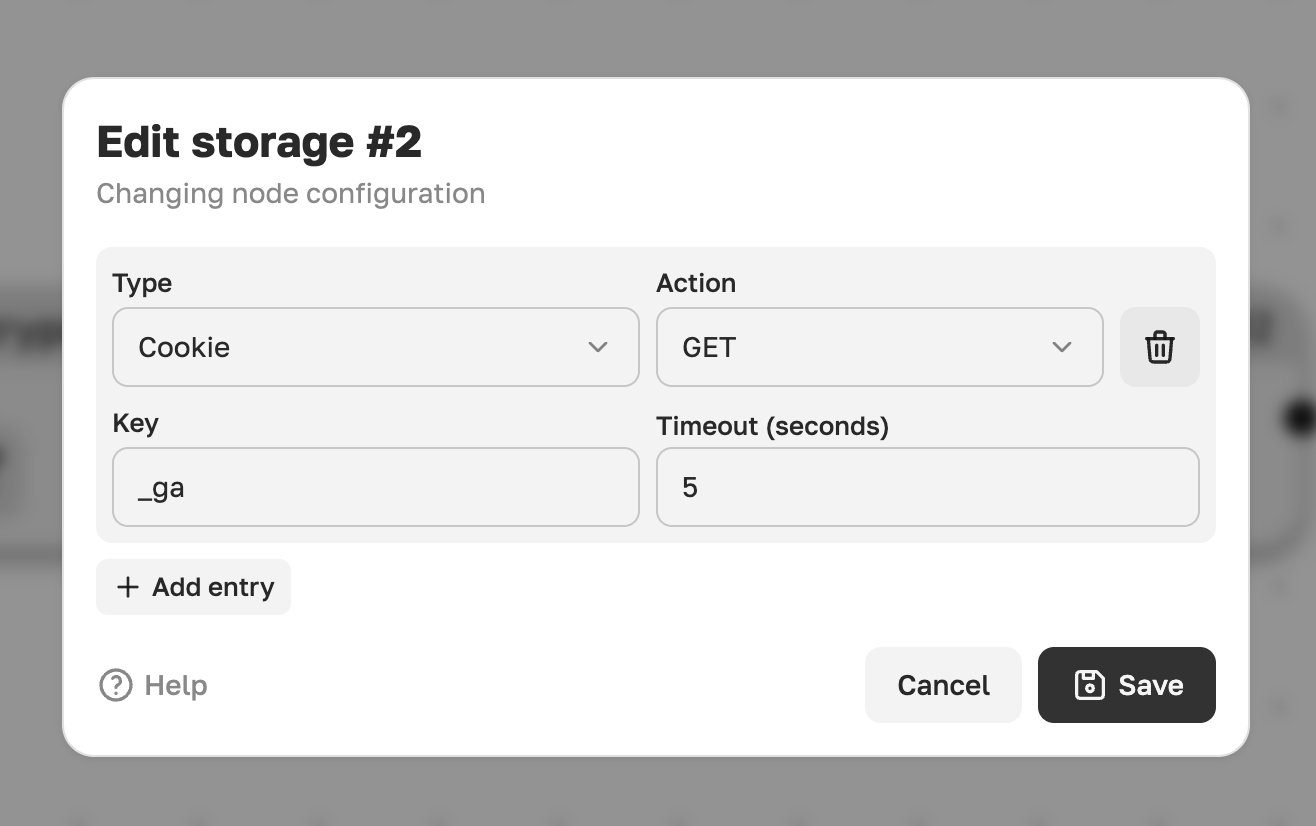
We use polling to retrieve this value because it typically becomes available only after the Google Tag Manager script has loaded. In this case, we will check for the value’s availability for up to 5 seconds and proceed as soon as it appears.
In your pixel, you can use any nodes and collect all the visitor data you’re interested in. However, for demonstration purposes, this should be sufficient.
Now let’s add a collect node and see what data we can access so far!
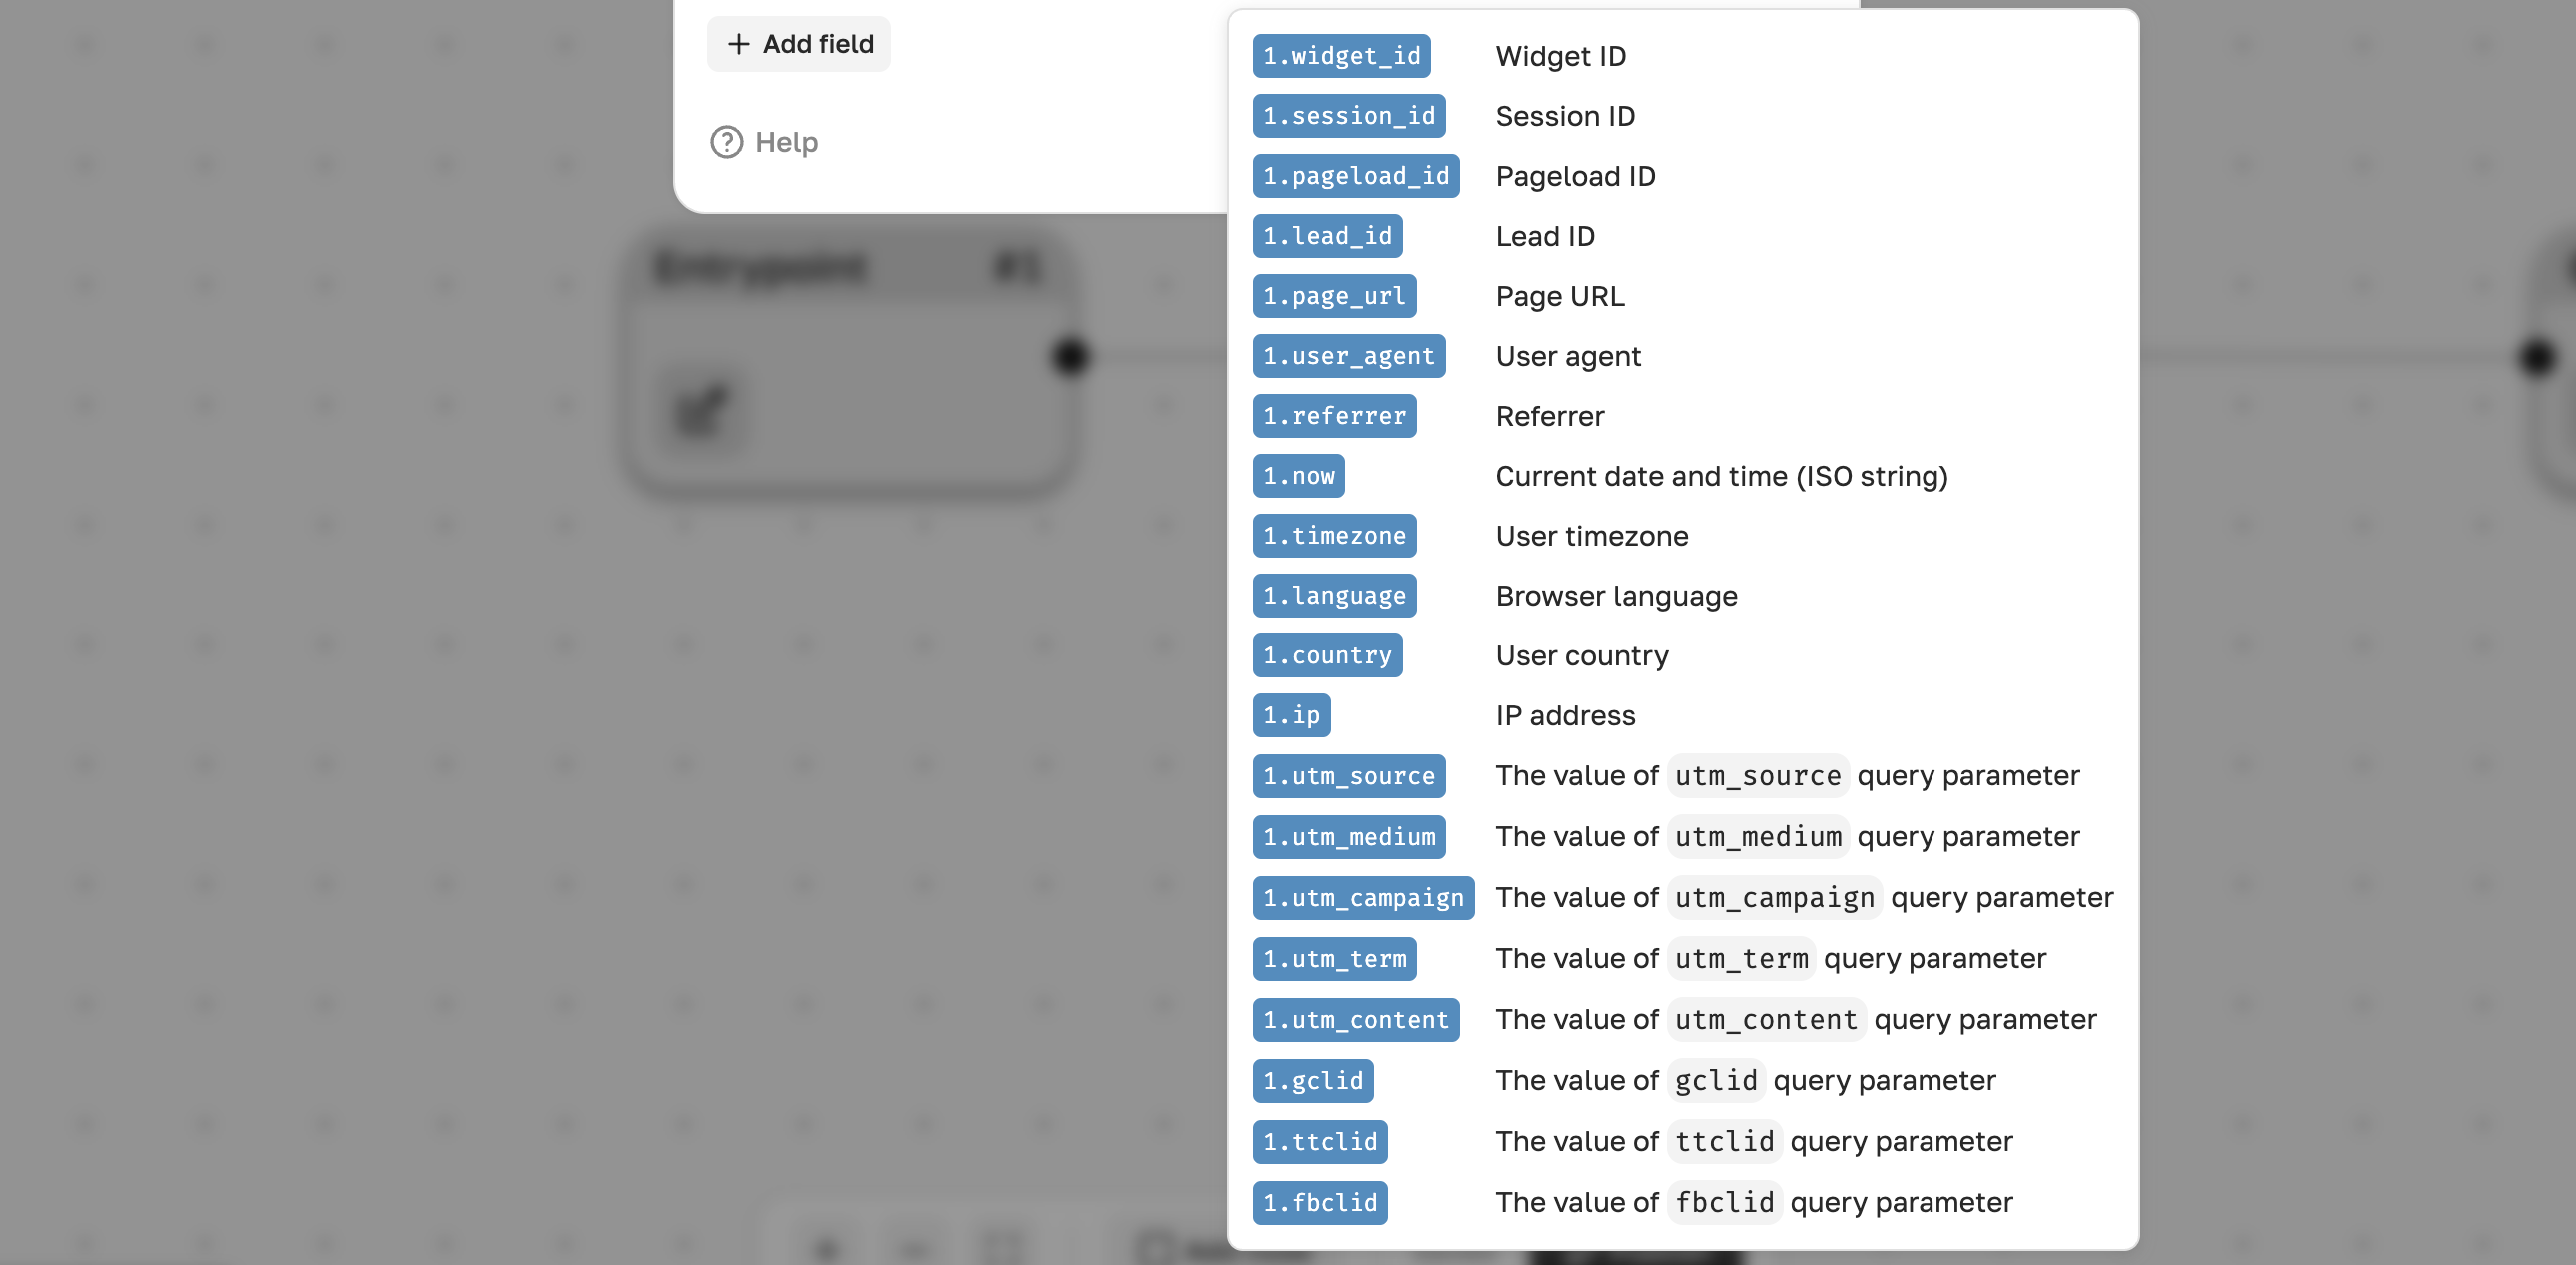
You can control exactly how much and what kind of data you want to collect.
Note that in this case, data will be collected for every page visitor. This may be inefficient on some of our plans. Such a flow will consume one operation per visitor, so consider upgrading to a higher plan.